HeuDiConv
HeuDiConv stands for Heuristic Dicom Converter and is a flexible pipeline for converting DICOMs to a BIDS formatted data structure. Using dcm2niix, conversion to the nifti formmat is fast and requires minimal user input. This document aims to instruct users on how to install and use HeuDiConv on the Cheaha computing cluster. HeuDiConv’s full documentation is outdated but can be found here for further information.
Installation
HeuDiConv works best when installed as a Python library in an Anaconda virtual environment. For more information on creating and using Anaconda virtual environments on the cluster, visit the Research Computing Docs.
HeuDiConv Installation
First, load an Anaconda module on Cheaha, create a virtual environment, and
activate it. From there, you can use pip to install the Heudiconv library
using:
module load Anaconda3/2020.11

# create and/or activate your virtual environment here

pip install heudiconv==0.9.0
HeuDiConv’s most recent release is version 0.10.0 but has not been tested on Cheaha. Version 0.9.0 is currently suggested.
This will download the latest version of Heudiconv. After installation, you can
use the library through the heudiconv command.
Note
In some cases, HeuDiConv will download to your ~/.local/bin directory
and will not be automatically added to your bash path. This will result in a
-bash: heudiconv: command not found error. Use
PATH=$PATH:~/.local/bin to fix this issue if it arises.
dcm2niix Installation
In addition you will need to download the dcm2niix library to your virtual
environment to actually convert from DICOM to nifti. You can access this library
at conda-forge using the following command:
conda install -c conda-forge dcm2niix
Initial Folder Structure
To begin, make sure your DICOM files are organized consistently across the project you are converting. For instance, a preferred organization is:
|-- dataset/
    |-- dicom
    |   |-- S101/
    |   |   |-- [ses-01/]
    |   |   |   |-- scan-01/
    |   |   |   |   |-- ***001.dcm
    |   |   |   |   |-- ***002.dcm
    |   |   |   |   |-- ...
    |   |   |   |
    |   |   |   |-- scan-02/
    |   |   |       |-- ***.dcm
    |   |   |
    |   |   |-- [ses-02/]
    |   |
    |   |-- S102/
    |   |
    |   |-- S103/
    |
    |-- nifti (empty)
Inclusion of the session directory level is optional if there is only one session per participant. The names of the dicom files themselves do not need to be altered in any way before running HeuDiConv.
If your data is stored in a different format but has a consistent structure, that is fine. It is just important that the subject name as well as session number (if multiple sessions were acquired) are easily extracted from the file path.
Running HeuDiConv
While going through these steps, we will assume the directory tree is structured as above. If your dataset directory structure is different, the command will need to be adjusted to account for it.
Step 1: Generate Scan Info
Note
If you already have a heuristic file to use with your dataset, skip to Step 3.
The first step in Heudiconv generates a hidden directory with information about each scan found in the subject and session folder you specify. This information will be used to create what is called a heuristic file which will be covered in Step 2. To generate this hidden folder, run:
heudiconv -s <subject> -ss <session> -d <dataset_path>/dicom/{subject}/ses-{session}/*/*.dcm -o <dataset_path>/nifti -f convertall -c none --overwrite
Note
For any command in this guide, replace anything inside <> with the
necessary information. For instance, if the given subject name is S100,
<subject> would be replaced with S100 here.
The command, broken down:
<dataset_path>is the path to the dataset directory. We can use this variable in the main command to make it more succinct.-sand-ss: specify the subject(s) and session(s) to process respectively. These can either be a single entry or a list.-d: the path to the dicom images for the given subject and session. {subject} and {session} in the path will be replaced by the -s and -ss values, respectively. If a list for either -s or -ss is given, this command will iterate through the list, automatically changing the {subject} and {session} values as needed. From there, glob syntax is used to find all the dicoms in all the scan folders (the/*/*.dcmpart).-o: the output directory-f: the heuristic file to use, set toconvertallhere because a heuristic has not yet been generated.-c: the converter to use. None here because we are only generating scan info, not yet converting--overwrite: overwrite existing files.
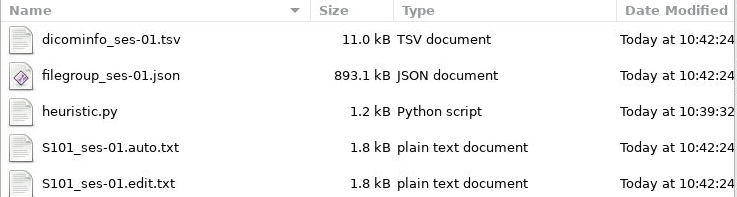
The output of Step 1 is a hidden folder at the path
<dataset_path>/nifti/.heudiconv. It will contain a folder for each
participant with a generic heuristic.py file and a dicominfo_ses-**.tsv
file inside. An example can be seen below:
Copy the heuristic.py and dicominfo_ses-**.tsv files to the dataset directory.
Step 2: Modify The Heuristic
In order to correctly name and sort the different types of scans into their proper folders, Heudiconv uses a user-generated file called a heuristic file that controls how each scan is sorted into the BIDS framework. Because every protocol uses different scans and tasks, the heuristic file is also different across protocols. However, once one heuristic is created for a dataset, as long as the scans do not change, the heuristic only needs to be created once. If there is more than one session, and the scans change between sessions, one heuristic for each unique session should be created.
If you open the heuristic.py in a text editor, it will look similar to this:
########################## DO NOT CHANGE ##############################
import os

def create_key(template, outtype=('nii.gz',), annotation_classes=None):
    if template is None or not template:
        raise ValueError('Template must be a valid format string')
    return template, outtype, annotation_classes

#######################################################################

def infotodict(seqinfo):
    """Heuristic evaluator for determining which runs belong where

    allowed template fields - follow python string module:

    item: index within category
    subject: participant id
    seqitem: run number during scanning
    subindex: sub index within group
    """
    ########################## Scan Keys ##############################
    data = create_key('run{item:03d}')
    info = {data: []}

    ################# Associate Keys with Scans #######################
    for idx, s in enumerate(seqinfo):
        info[data].append(s.series_id)
    return info
Creating Scan Keys
The infotodict function is where edits will be made. The first is to create
keys for the various types of scans. These entries will be used to rename the
scans to be BIDS-compliant, including the full path to the scan.
For the parts of the BIDS name that are variable, such as the subject name,
session number, or run number, the value part of the key-value pair should be
placed in {}. These values are then specified in the for loop in the next
section. The {item:01d} tag will automatically number multiple scans of the
same type within the same session based on acquisition order.
Examples for T1w, resting-state BOLD, and a spin-echo fieldmap can be see below.
########################## Scan Keys ##############################
# T1w
t1 = create_key('sub-{subject}/ses-{session}/anat/sub-{subject}_T1w')

# multiband resting state
rest = create_key('sub-{subject}/ses-{session}/func/sub-{subject}_task-rest_dir-{dir}_run-{item:01d}_bold')
rest_sbref = create_key('sub-{subject}/ses-{session}/func/sub-{subject}_task-rest_dir-{dir}_run-{item:01d}_sbref')

# phase encoded spin-echo fieldmap
fmap = create_key('sub-{subject}/ses-{session}/fmap/sub-{subject}_dir-{dir}_run-{item:01d}_epi')

info = {t1:[], rest:[], rest_sbref:[], fmap:[]}
The last line initializes a dict python object named info used in the
next section. Include an entry for every scan type you named above it.
In all cases, the names passed to the create_key function should be
templated to the BIDS format described in the Example Name Formats
section or on the main BIDS documentation.
Associating Keys with Scan Parameters
The next section loops through the scan directories and sorts the scans into
the initialized info object. Here, you will using info from the
dicominfo_ses-**.tsv file copied earlier to create matching criteria to
correctly sort scans. If you open the tsv file, you will see something that
looks like:
series_id |
dcm_dir_name |
series_files |
dim1 |
dim2 |
dim3 |
dim4 |
TR |
TE |
series_description |
image_type |
9-SpinEchoFieldMap_AP |
9-SpinEchoFieldMap_AP |
3 |
104 |
104 |
72 |
3 |
8 |
66 |
SpinEchoFieldMap_AP |
(‘ORIGINAL’, ‘PRIMARY’, ‘M’, ‘ND’, ‘MOSAIC’) |
11-SpinEchoFieldMap_PA |
11-SpinEchoFieldMap_PA |
3 |
104 |
104 |
72 |
3 |
8 |
66 |
SpinEchoFieldMap_PA |
(‘ORIGINAL’, ‘PRIMARY’, ‘M’, ‘ND’, ‘MOSAIC’) |
13-T1w_MPR |
13-T1w_MPR |
208 |
320 |
300 |
208 |
1 |
2.4 |
2.22 |
T1w_MPR |
(‘ORIGINAL’, ‘PRIMARY’, ‘M’, ‘ND’) |
14-T1w_MPR |
14-T1w_MPR |
208 |
320 |
300 |
208 |
1 |
2.4 |
2.22 |
T1w_MPR |
(‘ORIGINAL’, ‘PRIMARY’, ‘M’, ‘ND’, ‘NORM’) |
23-rfMRI_REST01_AP |
23-rfMRI_REST01_AP_SBRef |
1 |
104 |
104 |
72 |
1 |
0.8 |
37 |
rfMRI_REST01_AP_SBRef |
(‘ORIGINAL’, ‘PRIMARY’, ‘M’, ‘ND’, ‘MOSAIC’) |
24-rfMRI_REST01_AP |
24-rfMRI_REST01_AP |
420 |
104 |
104 |
72 |
420 |
0.8 |
37 |
rfMRI_REST01_AP |
(‘ORIGINAL’, ‘PRIMARY’, ‘M’, ‘MB’, ‘ND’, ‘MOSAIC’) |
26-rfMRI_REST01_PA |
26-rfMRI_REST01_PA_SBRef |
1 |
104 |
104 |
72 |
1 |
0.8 |
37 |
rfMRI_REST01_PA_SBRef |
(‘ORIGINAL’, ‘PRIMARY’, ‘M’, ‘ND’, ‘MOSAIC’) |
27-rfMRI_REST01_PA |
27-rfMRI_REST01_PA |
420 |
104 |
104 |
72 |
420 |
0.8 |
37 |
rfMRI_REST01_PA |
(‘ORIGINAL’, ‘PRIMARY’, ‘M’, ‘MB’, ‘ND’, ‘MOSAIC’) |
This gives information taken from the dicom headers of each scan in the session. Use it to create criteria to match the dicom scans to the keys created above.
For example, for the resting state BOLD, there are 420 volumes and the
series_id field contains REST in it. No other scan type in this session
matches those qualities, so we can match on those fields. The matching command
for this would look like:
################# Associate Keys with Scans #######################
for idx, s in enumerate(seqinfo):
    if (s.dim4 == 420) and ('REST' in s.series_id):
        info[rest].append({'item': s.series_id})
This will match any scans that have 420 volumes and 'REST' in their ID to
the rest key we made earlier. Here, the series_id field is assigned to
item which the key will use to change the run number, and the scan will be
appended to the rest list. If there is only one run of a given scan in a
session (such as a T1), you don’t need to use the append command and can
just assign the series_id directly (see the T1w field in the Example
Heuristic). At least one if statement should exist for each scan type in
the session.
Altering Subfields in the Key
Other subfields besides run number can be changed using the keys and
corresponding if statements. For instance, if you are running resting state
scans in both AP and PA directions (denoted by the dir key in a BIDS name),
this field should be added to the key, and two if statements should be added
to the loop, one for each direction. If multiple fields need to be substituted
for in the value name (such as the item and dir field for multiple
functional scans), they are both included as a comma-separated list in the
append command. See the Example Heuristic for an example.
For T1w and T2w scans where post-acquisition normalization occurs at the
scanner, two versions may be available for BIDS sorting. If you only want to
include the normalized version, match for 'NORM' in the image_type
field in your if statement.
From here, you can delete the tsv file as it is no longer necessary.
Step 3: BIDS Conversion
The next step is performing the conversion. The commands for this look very similar to those in Step 1, but have a couple of options changed. These can be seen below.
heudiconv -s <subject> -ss <session> -d <dataset_path>/dicom/{subject}/ses-{session}/*/*.dcm -o <dataset_path>/nifti -f <dataset_path>/heuristic.py -c dcm2niix -b --overwrite
The changes are -f which now points to the new heuristic file, -c which
specifies dcm2niix as the converter, and -b which sets the output to be
in BIDS format.
Step 4: Cleanup
The last step involves removing an unnecessary field from a json file that could cause BIDS validation to fail (depending on which Heudiconv version you are using) as well as associating the field map files with the functional and diffusion scans they should be applied to during distortion correction.
First, each type of functional scan will have an associated *_bold.json file
in the main nifti folder. Open it in a json file editor such as Atom
(available in Applications > Accessories on Cheaha). Remove the “CogAtlasID”
field if its entry is only “TODO”. For later versions of Heudiconv, it is in an
acceptable form of a URL so can be left alone.
Lastly, you need to associate the fieldmaps with their corresponding scans. This
can be done manually or through a custom script. For the manual process, open
the json sidecar file for one of the fieldmaps. You will need to add an
IntendedFor field to the json file with its values being relative paths to
the associated functional and/or diffusion files. This field can be placed
anywhere in the json file and should look like:
"IntendedFor": [
    "ses-01/func/func_scan_1.nii.gz",
    "ses-01/func/func_scan_2.nii.gz"
],
Replace the generic names with the real names of the nifti files and session directories. If session directories are omitted from the directory structure, omit them here as well.
Every fmap file needs to have an IntendedFor field in order to be used for
unwarping in fmriprep or other similar BIDS apps. For sessions where multiple
fieldmaps were acquired for separate sets of scans, the IntendedFor fields
will differ and care should be taken to make sure the field maps are associated
with the correct scans.
Optional Steps and Documentation
While the output of Heudiconv is a BIDS-compliant dataset and can be used immediately, files such as the dataset_description.json, the main task jsons, and the participant tsv and json files are not automatically filled out. Additionally, while the individual events.json files for each individual task scan are generated, they will need to be filled out by the researcher. More information about the task events files can be found here.
Resulting File Permissions
HeuDiConv has been found to automatically alter file permissions for the resulting niftis and jsons to where these files are read-only for owners, groups, and everyone. This can cause issues for software such as fmriprep that needs write permission for some of these files. If you are working with a group in a project directory and multiple people need to be able to use the BIDS-sorted data, the person who runs HeuDiConv (the owner of the created files) will need to add user and group write permissions for each json and nifti output file after HeuDiConv completes. To add these permissions for all files within a subject’s BIDS-sorted directory, you can use the following command:
find <path/to/BIDS/subject> -type f -exec chmod ug+w {} \;
Rerunning HeuDiConv
After running, HeuDiConv stores a copy of the heuristic file that was used for
conversion. Further runs default to using this copied heuristic instead of the
heuristic passed into the command. This means any changes to you made to the
heuristic will not be applied. If HeuDiConv needs to be rerun due to a change in
the heuristic file such as adding key-value pairs to the scan names, delete the
contents of the .heudiconv directory for the subject you are rerunning beforehand.